Using SeyGov
- API - Generate a New Token
- API - Prerequisites
- API - Records by application ID
- API - Record by intake ID
- Site - Application Deployment
- Site - Administration Intake
- Site - Administration Calendar
- Site - Administration Settings
- Site - Administration Deactivate
- Site - Administration Go to Application
- Site - Departments
- Site - Settings My Account
- Site - Settings My Organization
- Site - Settings My Departments
- Site - Settings Email Lists
- Site - Settings LDAP Connectivity
- Site - Settings Email Connectivity
- Site - Settings API
- Site - Settings Subscriptions
- Site - Add User
- Site - View Users
- Site - Add Group
- Site - View Groups
API - Generate a New Token
In order to generate a new token / API key there are a few prerequisite steps that must be followed first. Please be sure of the following before proceeding.
- Dashboard
- Generating new tokens can only be done from the Seygov dashboard
- You must be logged into your Seygov account, go to the settings drop down, and click API Settings
Once you've checked all the prerequisites you can generate a new token from the dashboard.
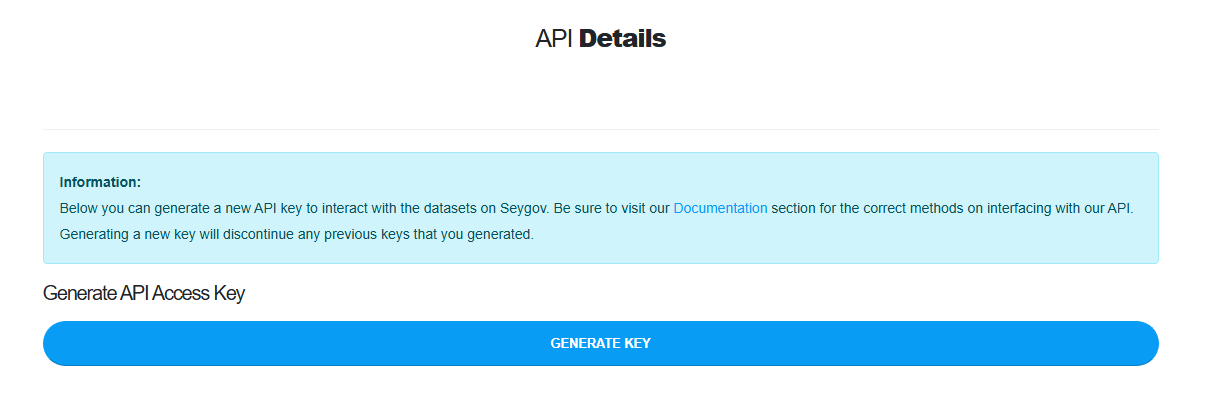
For reference the steps required are:
- Sign into https://seygov.com
- Click Dashboard from the top right menu
- Hover the Settings button from the main menu drop down
- Click API Settings
- Scroll down to Generate API Access Key
- Click the Generate Key button
- Click the token, it is a hyperlink, it will automatically copy the token to your clipboard.
API - Prerequisites
After generating your API token you are ready to start making API calls and communicating with our service. We recommend reading this page before starting and understanding limitations of our service as well as what is to be expected. We will also outline some useful methods and tools that should assist you with making our API service work with your usage.
Methods
- POST
- GET
We make use of POST and GET calls for our API services. If you are unfamiliar with what POST and GET is then we recommend reading this resource and getting more familiarized with them. The reason for the two different usages are as follows.
Our service makes use of GET calls to return lists. Some of our filtered queries have acceptable values. Our GET APIs will return those lists that you can make use of.
Return
- JSON (JavaScript Object Notation)
- SUCCESS: 200 or 201 or 202
- ERROR: 400 or 404 or 403 or 500
Our service returns back JSON (JavaScript Object Notation). If you are unfamiliar with JSON we recommend reading this resource and better familiarizing yourself with it. In short JSON is similar to an array; there are keys and there are values. As you go through the documentation for each API service we will define what each key is and the data type to expect as the value. It is up to you and your application on how you decide to parse that information. Many languages have built in functions for decoding it, and looping through it. For example PHP has json_decode / json_encode. Depending on what language your application is written in, I would check the documentation for that language. Below is an example of a JSON return from Seygov, upon a successful call this is the type of return to expect.
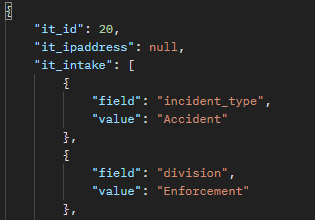
In the event of a successful RETURN you should expect back an HTTP status code of 200 or in some cases 201 or 202. It is not necessarily required for you to understand what all the HTTP status codes are but they do assist in making a fully functional application. If you are unfamiliar with HTTP status codes we recommend reading this resource.
Failed calls or returns will most likely show 400, 404, 405, or 500. If you receive one of these error codes back it doesn't necessarily mean that your code is incorrect. It is possible that our service or API service is down for the moment. Before evaluating your code for mistakes we do recommend checking our status page first. If you scroll to the bottom you can check our real time status graph to determine if our site services are up or down.
If our service is currently up and running and you are getting failed returns, then we recommend validating that you have the correct information required in the call, and that there are no mistakes in your application code.
Code Language
We do not have any restrictions for coding languages. As long as your application can make POST and GET calls, and receive JSON back. It is important to note that whatever language you choose should also be able to pass HEADERS with the request call. Our API service makes use of the Authorization header for your API Tokens, and the Accept header for application/json.
There are plenty of coding languages to choose from and because of that we unfortunately cannot assist you with writing your application or calls. Any examples we provide will most likely be in a singular language.
Headers
Our application makes use of two headers when making a POST or GET call. We use Authorization and Accept. Authorization must be followed by your API Token. Accept must be followed by application/json.
Testing Resources
We recommend Postman. Postman has both paid and free services for allowing you to test your API GET and POST calls to our service. This is not required but it can make the process easier to test our calls before implementing them into your project.
API - Records by application ID
Records by Application ID /records-by-app-id/{application}
- API: https://seygov.com/api/records-by-app-id/{application}
- METHOD: GET
HEADER
POST Variables
- NONE
GET Variables
- application
- Vanity URL for the application you want to retrieve records for. Can be found after launching an app. For example:
incident-report
- Vanity URL for the application you want to retrieve records for. Can be found after launching an app. For example:
RETURN
- it_id: integer
- Unique identifier for the intake record
- it_ipaddress: string
- IP address of the submitter
- it_intake: array
- Collection of field responses for this record
- field: string
- The name of the field as defined in the application
- value: string or array
- The submitted value. Returns a string for text fields, or an array for checkbox/multi-select fields
- field: string
- Collection of field responses for this record
- created_at: timestamp
- Date and time the record was submitted
API - Record by intake ID
Record by Intake ID /record-by-intake-id/{application}/{intake}
- API: https://seygov.com/api/record-by-intake-id/{application}/{intake}
- METHOD: GET
HEADER
POST Variables
- NONE
GET Variables
- application
- Vanity URL for the application. For example:
incident-report
- Vanity URL for the application. For example:
- intake
- The unique numeric ID of the specific intake record you want to retrieve
RETURN
- it_id: integer
- Unique identifier for the intake record
- it_ipaddress: string
- IP address of the submitter
- it_intake: array
- Collection of field responses for this record
- field: string
- The name of the field as defined in the application
- value: string or array
- The submitted value. Returns a string for text fields, or an array for checkbox/multi-select fields
- field: string
- Collection of field responses for this record
- created_at: timestamp
- Date and time the record was submitted
Site - Application Deployment
Prerequisites
Before deploying a new application, ensure the following:
- You are logged into your SeyGov account
- Your user group has the Deploy New permission enabled. If you do not see the Deploy New option in the navigation menu, contact your administrator to update your group permissions
- At least one department has been created under Settings > My Departments
- If you plan to use email notifications, at least one email list has been configured under Settings > Email Lists
Step 1 — Select an Application
Click the application you would like to deploy. This will bring you to the deployment configuration page for that application.
Step 2 — Application Name
In the Application Name field, enter a name for this deployment. This name will be displayed to users when they access the application and will appear in the administration panel.
The system will automatically generate a vanity URL from the name you enter. This vanity URL must be unique to your organization — if a deployment with the same name already exists you will be prompted to choose a different name.
Step 3 — Department
Select the department this application belongs to from the Department dropdown. The departments listed are pulled from your organization's department list which can be managed under Settings > My Departments.
Assigning a department helps organize your applications and makes them easier to find on the department pages.
Step 4 — Application Settings
Depending on the application you selected, you may see one or more of the following settings:
Email Receipt
Choose whether the person submitting the form receives an email confirmation after their submission is received. Select Yes to enable or No to disable.
If Yes is selected, the submitter will receive an email to the address they provided in the form containing a PDF copy of their submission.
Email Distribution List
Select one or more distribution lists to receive an email notification each time a new submission is received. Distribution lists can be created and managed under Settings > Email Lists.
If no distribution lists have been configured, this option will not appear or will have no available selections.
Approval Process
Choose whether submissions require admin approval before being considered complete. Select Yes to enable an approval workflow where all new submissions will have a status of Pending until an administrator reviews and approves or denies them. Select No if submissions should be automatically marked as approved upon receipt.
Public Facing
Choose whether this application is accessible to users who are not logged in. Select Yes to allow anyone with the link to submit the form without requiring a login. Select No to restrict the application to logged in users only.
Step 5 — Notes
The Notes field is optional. Any text entered here will be displayed to the user when they are filling out the application form. Use this field to provide instructions, important information, deadlines, or any other context that would be helpful to the person submitting the form.
Step 6 — Deploy
Once all fields have been filled out and your settings have been configured, click the Deploy button at the bottom of the page.
You will be redirected to the administration panel for your newly deployed application where you can begin managing submissions, updating settings, and monitoring activity.
After Deployment
Once deployed your application will appear in the navigation menu under its assigned department. You can return to the application settings at any time from the administration panel by clicking Settings in the navigation to update any of the options configured during deployment.
Site - Administration Intake
Overview
The Intake section of the administration panel displays all submissions received for this application in a table format. Each row represents a single submission and shows the key fields configured for this application along with the current status of the record.
Intake Table
The table columns are automatically generated based on the fields configured for this application. Each submission displays the relevant field values alongside a Status column showing the current state of the record such as Pending, Approved, Denied, or Under Review.
Search
A search bar is available above the table. Enter any keyword to filter submissions by their field values. The search works across all intake data for this application.
Pagination
If there are more than 25 submissions the table will paginate automatically. Use the page controls below the table to navigate between pages.
Viewing a Record
Click the VIEW button on any row to open the full record in a read only view. From the record view you can perform the following actions:
Update Status
A status dropdown is available at the top of the record. Select the appropriate status from the available options and click Update Status to save the change. If the application has an approval process enabled, new submissions will arrive with a status of Pending until reviewed here.
PDF Export
Click the PDF Export button to download a PDF copy of the submission. The PDF includes all field labels and their submitted values along with the record number, current status, and submission timestamp.
Notes
Click the Notes button to open the notes page for this record. Notes are internal and visible to administrators only. From the notes page you can view all existing notes left by administrators in chronological order with the author name and timestamp, and add new notes using the form at the bottom of the page. Notes cannot be edited or deleted once submitted.
Site - Administration Calendar
Overview
The Calendar section of the administration panel displays approved submissions plotted on a monthly calendar grid based on their event date. Only submissions with a status of Approved will appear on the calendar, making it easy to see scheduled and confirmed events at a glance.
Navigating the Calendar
The calendar displays one month at a time with the current month shown by default. Use the ← Prev and Next → buttons at the top of the calendar to navigate between months. The month and year are displayed in the center between the navigation buttons.
Calendar Events
Each day cell on the calendar will display any approved submissions that fall on that date. Each event shows:
- Organization or submitter name displayed in uppercase
- Start time and end time of the event
Clicking on an event will take you directly to the full record view for that submission where you can review the details, update the status, export a PDF, or leave notes.
Today
The current date is highlighted on the calendar so you can quickly identify today relative to other scheduled events.
Notes
- Only submissions with an Approved status will appear on the calendar. Pending, Denied, Under Review, and Cancelled submissions are not displayed.
- If no approved submissions exist for a given month the calendar will display empty day cells with no events.
- To approve a pending submission navigate to the Intake section, open the record and update the status to Approved.
Site - Administration Settings
Overview
The Settings section of the administration panel allows administrators to modify the configuration of a deployed application at any time. Changes made here will take effect immediately for all new submissions.
Application Settings
Application Name
Update the display name of the application. This name is shown to users when they access the form and appears throughout the administration panel. The vanity URL is generated from the original name at deployment and cannot be changed after deployment.
Department
Reassign the application to a different department from the dropdown. The departments listed are pulled from your organization's department list which can be managed under Settings > My Departments.
Email Receipt
Choose whether the person submitting the form receives an email confirmation after their submission is received. Select Yes to enable or No to disable.
Email Distribution List
Select one or more distribution lists to receive an email notification each time a new submission is received. Distribution lists can be created and managed under Settings > Email Lists. Check or uncheck any list to add or remove it from notifications.
Approval Process
Choose whether submissions require admin approval before being considered complete. Select Yes to enable the approval workflow where all new submissions arrive with a status of Pending. Select No to have submissions automatically marked as Approved upon receipt.
Public Facing
Choose whether this application is accessible to users who are not logged in. Select Yes to allow anyone with the link to submit the form without requiring a login. Select No to restrict the application to logged in users only.
Notes
Update the notes field that is displayed to the user when they are filling out the application form. Use this field to provide instructions, important information, deadlines, or any other context helpful to the person submitting. Leave blank if no notes are needed.
Click Save Settings to apply any changes made to the above options.
Custom List Options
Depending on the fields configured for this application, one or more custom list sections may appear below the main settings form. These sections allow administrators to manage the selectable options for dropdown and checkbox fields that are specific to this deployment.
Viewing Current Options
Each custom list section displays the field label at the top followed by a numbered list of all currently available options for that field. These are the options that users will see when filling out the form.
Adding a New Option
At the bottom of each list section there is an input field with an Add button. Enter the label for the new option and click Add to make it immediately available to users filling out the form.
Removing an Option
Each existing option has a Remove button next to it. Click Remove to permanently delete that option from the list. Removing an option will not affect submissions that have already been recorded with that value.
Notes
- Custom list options are specific to this deployment and do not affect other applications even if they use the same field types.
- Options that come from organization wide lists such as departments are managed separately under Settings and are not editable from this page.
Site - Administration Deactivate
What Happens When You Deactivate
- The application will no longer be accessible to users — the form will not be available for new submissions
- The application will be removed from the department page and navigation menus
- All existing submission records, notes, and history are preserved and are not deleted
- If your organization is on a membership plan with a limit on the number of active applications, deactivating this application will reduce your active application count making room to deploy a new one
Reactivation
Once deactivated an application cannot be reactivated from the administration panel. If you need to redeploy the application you can do so from the Deploy New menu. Any previously configured settings will need to be reconfigured on the new deployment.
Notes
- Deactivation is permanent from the administration side — proceed with caution
- If you are unsure whether to deactivate, consider updating the application settings instead such as restricting it to internal users only by setting Public Facing to No
Site - Administration Go to Application
The Go to Application button is available in the administration navigation panel. Clicking this button will take you directly to the front facing submission form for this application — the same page that users see when they fill out and submit the form.
This is useful for administrators who want to preview the form, verify that fields and instructions are displaying correctly, or submit a test entry to confirm the application is working as expected.
Site - Departments
Overview
Clicking on a department name from the application navigation menu will take you to the department page. This page provides a centralized view of all active applications deployed under that department, giving administrators a quick summary of activity and easy access to manage each application.
Application List
All active applications belonging to the selected department are displayed in a table with the following columns:
Application
The name of the deployed application.
Records
A count of the total number of submissions received for that application. This gives administrators a quick at a glance view of activity without having to open the administration panel.
Deployed
The date the application was originally deployed.
Application Options
Each application row has a set of action buttons on the right side:
Open
Takes you directly to the front facing submission form for that application — the same page users see when filling out and submitting the form.
Admin
Takes you to the administration panel for that application where you can view the intake table, calendar, and individual submission records.
Settings
Takes you directly to the settings page for that application where you can update the application name, department, notification preferences, approval process, public facing status, notes, and custom list options.
Deactivate
Deactivates the application immediately after confirming your decision through a confirmation prompt. See the Deactivation section of the Settings documentation for more details on what happens when an application is deactivated.
Notes
- Only applications with an active status are displayed on the department page
- If no applications have been deployed under a department the page will display an empty table
- The record count reflects all submissions regardless of their current status
Site - Settings My Account
Overview
The My Account page allows you to manage your personal account credentials. From here you can update your account password to keep your account secure.
Change Password
To update your password fill out the following fields:
Current Password
Enter your existing password to verify your identity before making any changes. If you do not know your current password use the Forgot Password option on the login page to reset it.
New Password
Enter the new password you would like to use for your account. Passwords must be a minimum of 8 characters.
Confirm New Password
Re-enter your new password exactly as you typed it in the previous field. Both fields must match for the change to be accepted.
Once all three fields are filled out click the Update Password button to save your changes. You will remain logged in after a successful password change.
Notes
- If you are an LDAP user your password is managed by your organization's directory and cannot be changed from this page
- For security purposes your current password is always required before a new password can be set
- If you forget your current password log out and use the Forgot Password link on the login page
Site - Settings My Organization
Overview
The My Organization page allows you to manage your organization's profile information. This information is used throughout the platform including the navigation header, application forms, and your organization's public facing pages.
Organization Details
Organization Name
Update the display name of your organization. This name appears in the navigation header and throughout the platform wherever your organization is referenced.
Domain URL
Update the domain associated with your organization. This is used for LDAP authentication to match users logging in with your organization's email domain to your account.
Organization Image
Upload a custom image or logo for your organization. Once uploaded the image will appear in the navigation header across all pages. Accepted file types are PNG, JPEG, and JPG with a maximum file size of 2MB.
If an image has already been uploaded it will be displayed here. To replace it simply upload a new image and the previous one will be replaced automatically. If you would like to remove the image entirely without replacing it use the remove option to revert to the default text header.
Membership Information
Membership Status
Displays the current status of your organization's membership. This field is read only and cannot be updated from this page. Please contact support if you have questions about your membership status.
Membership Plan
Displays the membership plan your organization is currently subscribed to. This field is read only and cannot be updated from this page. To upgrade or downgrade your plan visit the billing section or contact support.
Organization Information
Government Type
Select the type of government your organization represents such as County, Village, Town, City, or other available classifications. This helps categorize your organization within the platform.
Address
Enter the physical street address of your organization.
City
Enter the city your organization is located in.
State
Enter the state your organization is located in.
Zip Code
Enter the zip code for your organization's address.
Click Save to apply any changes made to your organization's information.
Notes
- Changes to the organization name will take effect immediately across the platform
- Membership plan and status changes must be handled through the billing or support process and cannot be self managed from this page
- Uploading a new organization image will automatically replace the previous one
Site - Settings My Departments
Overview
The My Departments page allows you to manage the departments within your organization. Departments are used to organize your deployed applications and give each area of your organization its own dedicated page displaying its relevant applications.
Adding a New Department
To add a new department enter the department name in the Add Department field and click Add. The system will automatically generate a vanity name from the department name you enter. For example entering Information Technology will generate a vanity name of information-technology which is used in the department page URL.
Notes on Department Names
- Department names must be unique within your organization
- If a department with the same name already exists you will be prompted to choose a different name
- The vanity name is generated automatically and cannot be manually edited
Editing a Department
To edit an existing department select the department you want to modify from the Departments dropdown and click Edit. The department's current details will appear in the edit form below.
Department Name
Update the name of the department. The vanity name will be automatically regenerated from the new name you enter. If the new name conflicts with an existing department name you will be prompted to choose a different name.
Department Image
Upload a custom image for the department. This image will be displayed on the department's page and can be used to visually identify the department. Accepted file types are PNG, JPEG, and JPG with a maximum file size of 2MB.
If a department image has already been uploaded it will be displayed with a View Current Image link. Uploading a new image will automatically replace the previous one — previous images are retained in the system for record keeping but only the most recently uploaded image will be displayed.
Click Edit to save any changes made to the department.
Notes
- Departments must be created before they can be assigned to a deployed application
- Deleting a department is not available from this page — to remove a department from use deactivate all applications assigned to it
- The vanity name is used in the department page URL and is regenerated automatically whenever the department name is updated
- Changes to the department name will be reflected immediately across the platform including the navigation menu and department pages
Site - Settings Email Lists
Overview
The Email Lists page allows you to create and manage distribution lists for your organization. These lists are used in deployed applications to send email notifications to a group of recipients when a new submission is received. Multiple lists can be created and assigned to different applications based on your notification needs.
Creating a New List
To create a new email list enter a name for the list in the List Name field and click Add. The list name should be descriptive enough to identify its purpose, for example Room Reservation Notifications or IT Department Alerts.
Once created the list will appear in the available lists and you can begin adding email addresses to it.
Adding Email Addresses
To add an email address to a list select the list from the dropdown and enter the email address in the Add Email field and click Add. The email address will be immediately added to the list and will receive notifications for any application that has this list selected in its settings.
There is no limit to the number of email addresses that can be added to a single list.
Editing an Email Address
To edit an existing email address in a list locate the address in the list and click the Edit button next to it. Update the email address and click Save to apply the change. The updated address will be used for all future notifications sent to this list.
Removing an Email Address
To remove an email address from a list locate the address and click the Remove button next to it. The address will be immediately removed from the list and will no longer receive notifications. This does not affect any previously sent notifications.
Managing Lists Across Applications
Email lists are organization wide and can be assigned to multiple applications at the same time. When a list is updated by adding or removing email addresses the changes apply immediately to all applications that have that list selected.
To assign an email list to an application navigate to the application's Settings page from the administration panel and select the desired lists under the Email Distribution List setting.
Notes
- Email lists must be created before they can be assigned to an application during deployment or from the application settings page
- Removing an email address from a list will not affect submissions that have already been sent — only future notifications are impacted
- If an email list is deleted any applications that had it selected will no longer send notifications to those recipients — review your application settings after removing a list
Site - Settings LDAP Connectivity
Overview
The LDAP Connectivity page allows you to configure your organization's LDAP server settings. When configured correctly users within your organization can log into the platform using their existing network credentials without requiring a separate password, streamlining the login process and centralizing user management.
LDAP Settings
LDAP Host
Enter the hostname or IP address of your organization's LDAP server. This is the address the platform will use to establish a connection when a user attempts to log in with their network credentials. For example ldap.yourdomain.com or 192.168.1.1.
LDAP Base DN
Enter the Base Distinguished Name for your LDAP directory. The Base DN defines the starting point within your directory from which the platform will search for users. For example dc=yourdomain,dc=com or ou=users,dc=yourdomain,dc=com.
LDAP Port
Enter the port number your LDAP server is listening on. The default port for standard LDAP connections is 389. If your organization uses LDAP over SSL the port is typically 636.
Click Save to apply your LDAP configuration changes.
How LDAP Login Works
Once LDAP is configured users can log in using their organization email address and network password. The platform will attempt to authenticate against your LDAP server using the credentials provided. If authentication is successful the user will be logged in and a local account will be created automatically if one does not already exist.
New accounts created through LDAP are assigned to the Verifying group by default. An administrator must update the user's group assignment from the My Users page before they will have access to the appropriate areas of the platform.
Notes
- LDAP connectivity requires that your server is accessible from the platform's hosting environment — ensure that your firewall and network settings allow the connection on the configured port
- The platform supports standard LDAP connections — contact support if your organization requires a specific LDAP configuration not covered by these settings
- If LDAP is not configured users will only be able to log in using a locally created account with a username and password
- Changes to LDAP settings take effect immediately for all subsequent login attempts
Site - Settings Email Connectivity
Overview
The Email Connectivity page allows you to configure your organization's SMTP server settings. When configured correctly the platform will send emails through your organization's own mail server for submission receipts, distribution list notifications, and other automated emails generated by your deployed applications.
SMTP Settings
SMTP Host
Enter the hostname of your organization's outgoing mail server. For example mail.yourdomain.com or smtp.gmail.com.
SMTP Port
Enter the port number your mail server uses for outgoing connections. Common port numbers are:
- 25 — Standard SMTP
- 465 — SMTP over SSL
- 587 — SMTP with TLS (recommended)
Encryption Method
Select the encryption method your mail server requires. Available options are:
- TLS — Transport Layer Security, typically used with port 587
- SSL — Secure Sockets Layer, typically used with port 465
- None — No encryption, typically used with port 25
Username
Enter the username used to authenticate with your mail server. This is typically the full email address associated with the sending account. For example notifications@yourdomain.com.
Password
Enter the password associated with the username above. This is used to authenticate with your mail server when sending emails.
Address From
Enter the email address that will appear in the From field of all emails sent by the platform. This should be a valid email address on your domain. For example noreply@yourdomain.com or notifications@yourdomain.com.
Click Save to apply your SMTP configuration changes.
Testing Your Configuration
After saving your settings it is recommended to send a test email to verify that the configuration is working correctly. Navigate to any deployed application and trigger a test submission with email receipt enabled to confirm that emails are being delivered successfully.
Notes
- Your SMTP credentials are stored securely and are only used to send emails on behalf of your organization
- If emails are not being delivered after saving your settings verify that your mail server allows connections from the platform's hosting environment and that the port you selected is not blocked by your firewall
- Changes to SMTP settings take effect immediately for all subsequent emails sent by the platform
- If no SMTP settings are configured the platform will fall back to the default system mailer which may result in emails being marked as spam or not delivered at all
Site - Settings API
Overview
The API Settings page allows you to generate and manage your organization's API access key. The API key is used to authenticate requests made to the SeyGov API, allowing you to integrate your deployed applications with external systems, pull submission data programmatically, and build custom workflows on top of your data.
Generating an API Key
Click the Generate API Access Key button to create a new API bearer token for your organization. Once generated the token will be displayed on the page — copy it and store it in a secure location as it will be needed to authenticate all API requests.
Using Your API Key
To authenticate API requests include your token in the Authorization header of every request using the Bearer token format:
Authorization: Bearer your-token-hereAll API requests must also include the following header:
Accept: application/jsonAPI Permissions
When generating an API key the token is scoped to specific permissions that control what data can be accessed. Current available permissions are:
- app-intake-read — Allows reading of intake records and submission data for your deployed applications
Available API Endpoints
Records by Application ID
Retrieve all submission records for a specific deployed application.
- Method: GET
- URL:
https://seygov.com/api/records-by-app-id/{application}
Record by Intake ID
Retrieve a single submission record by its unique intake ID.
- Method: GET
- URL:
https://seygov.com/api/record-by-intake-id/{application}/{intake}
For full API documentation including return values and field descriptions refer to the API Documentation section.
Notes
- Generating a new API key will invalidate any previously generated keys — update all integrations with the new token immediately after generating
- Store your API key securely and never share it publicly or commit it to source control
- If your API key is compromised generate a new one immediately from this page to revoke access for the old token
- API access is tied to your organization's membership plan — contact support if you require additional API permissions or higher request limits
Site - Settings Subscriptions
Overview
The Subscription page allows you to manage your organization's membership plan. From here you can view your current subscription details, change your membership plan, manage auto renewal, and review your order history.
Current Subscription
Plan
Displays your organization's currently active membership plan.
Start Date
Displays the date your current subscription period began.
End Date
Displays the date your current subscription period is set to expire. If auto renewal is enabled your subscription will automatically renew on this date.
Renewal Status
Displays whether auto renewal is currently enabled or cancelled for your subscription.
Changing Your Plan
To upgrade or downgrade your membership plan select the plan you would like to switch to and proceed through the payment process. Changing your plan will take effect immediately upon successful payment and your new plan limits will be applied right away.
Plan limits include:
- Maximum number of active deployed applications
- Maximum number of LDAP user accounts
- Access to additional features based on plan tier
Managing Auto Renewal
Cancelling Auto Renewal
If your subscription is currently set to auto renew you will see a Cancel Auto Renewal option. Clicking this will stop your subscription from automatically renewing at the end of the current period. You will retain access to your current plan until the end date and after that your account will revert to the free tier.
Cancelling auto renewal does not immediately affect your current subscription — your plan remains active until the end of the current billing period.
Re-enabling Auto Renewal
If auto renewal has been cancelled and you would like to re-enable it you can do so by selecting your current plan and completing the payment process to set up a new subscription.
Order History
A full history of your past orders and subscription payments is displayed in the order history table with the following information:
Plan
The membership plan associated with each order.
Status
The current status of the order such as Active, Completed, or Cancelled.
Start Date
The date the subscription period for that order began.
End Date
The date the subscription period for that order ended or is set to end.
Date Ordered
The date and time the order was placed.
Notes
- Changing your plan requires payment and is processed immediately through our secure payment provider
- Cancelling auto renewal will not issue a refund for the current billing period — your plan remains active until the end date
- If your subscription expires and you have more active applications or LDAP users than your new plan allows you will need to deactivate applications or disable user accounts to come back into compliance
- Contact support if you have any billing disputes or questions about your subscription
Site - Add User
Overview
The Add New User page allows administrators to manually create a new user account under your organization. This is used for creating accounts with a local password rather than LDAP authentication.
User Details
Email Address
Enter the email address for the new user. This will be used as their login username and must be unique within the platform.
Password
Enter a password for the new user. Passwords must be a minimum of 8 characters. The user can update their password after logging in from the My Account settings page.
Group
Select the user group to assign this user to. Groups control what areas of the platform the user has access to. Groups can be created and managed from the Add Group and View Groups pages. If you are unsure which group to assign, contact your administrator.
Department
Select the department this user belongs to. Departments are managed from the My Departments settings page.
Click Add User to create the account. The user will be able to log in immediately using the email address and password provided.
Notes
- Users created through this page will have a locally managed password and will not authenticate through LDAP
- If your organization uses LDAP, users who log in for the first time through LDAP will have their accounts created automatically and assigned to the Verifying group
- Ensure the correct group is assigned before the user logs in to avoid them having incorrect access
Site - View Users
Overview
The View Users page allows administrators to look up and manage existing user accounts within your organization.
Finding a User
Select a user from the email address dropdown to load their current account details. The user's information will appear in the edit form below the dropdown.
Updating a User
Email Address
Update the email address associated with the user's account. This will change their login username.
Group
Reassign the user to a different group to update their permissions and access levels across the platform.
Department
Reassign the user to a different department within your organization.
Status
Update the user's account status. Available statuses are:
- Active — The user can log in and access the platform normally
- Inactive — The user's account is disabled and they cannot log in
- Pending — The user's account is awaiting review and cannot log in
Click Update User to save any changes made to the user's account.
Notes
- Changing a user's group will take effect on their next page load or login
- Setting a user's status to Inactive or Pending will prevent them from logging in immediately
- LDAP users who have been automatically created will appear in this list and can be managed the same way as locally created users
- Removing a user from the system is not available from this page — set their status to Inactive to disable access
Site - Add Group
Overview
The Add Group page allows administrators to create a new user group and define its permissions. Groups control what areas of the platform users assigned to that group can access.
Group Name
Enter a name for the new group. The name should be descriptive enough to identify its purpose, for example Administration, Read Only, or Department Manager.
Group Permissions
Permissions are organized into categories. Check the box next to each permission you want to grant to this group. Unchecked permissions will not be accessible to users in this group.
Menu
Controls which top level navigation items are visible to users in this group.
- Breadcrumbs — Display navigation breadcrumbs throughout the platform
- Menu Category — Access to the main navigation categories
Apps
Controls access to deployed applications and their administration.
- Deploy New — Ability to deploy new applications from the suite
- Settings — Access to the organization settings pages
- Support — Access to the support section
- Users — Access to the user management section
Menu Item
Controls which specific applications appear in the navigation menu.
- Alerts
- Employee Clock In
- Employee Parking Pass
- Equipment Request
- Incident Report
- New User Request
- Permits
- Room Reservation
Feature
Controls access to the administration panel for each specific application.
- Admin — Alerts
- Admin — Employee Clock In
- Admin — Employee Parking Pass
- Admin — Equipment Request
- Admin — Incident Report
- Admin — New User Request
- Admin — Permits
- Admin — Room Reservation
Click Add Group to create the group. Once created the group will be available for assignment when adding or editing users.
Notes
- A default Verifying group exists in the system and is automatically assigned to new LDAP users upon their first login — this group has no permissions by default and requires an administrator to reassign the user to the appropriate group
- Permissions take effect immediately for all users currently assigned to the group
- At least one group with full permissions should always exist to ensure administrators retain access to all areas of the platform
Site - View Groups
Overview
The View Groups page allows administrators to manage existing user groups, update their permissions, change their status, and rename them.
Finding a Group
Select a group from the dropdown to load its current details and permissions in the edit form below.
Updating a Group
Group Name
Update the display name of the group.
Group Status
Update the status of the group. Available statuses are:
- Active — The group is available for assignment and its permissions are enforced
- Inactive — The group is disabled. Users assigned to an inactive group will lose access to all permissions
- Pending — The group is awaiting review and behaves the same as Inactive
Group Permissions
Update the permissions assigned to this group using the same permission checkboxes available when creating a group. Check or uncheck any permission to grant or revoke access for all users currently assigned to this group.
Permission changes take effect immediately for all users assigned to the group.
Click Update Group to save any changes.
Notes
- Be careful when modifying permissions for groups that have many users assigned — changes take effect immediately and could inadvertently restrict access
- Setting a group to Inactive will affect all users currently assigned to it — consider reassigning users before deactivating a group
- The Verifying group should not be modified or deleted as it serves as the default group for new LDAGO users and is expected to have no permissions